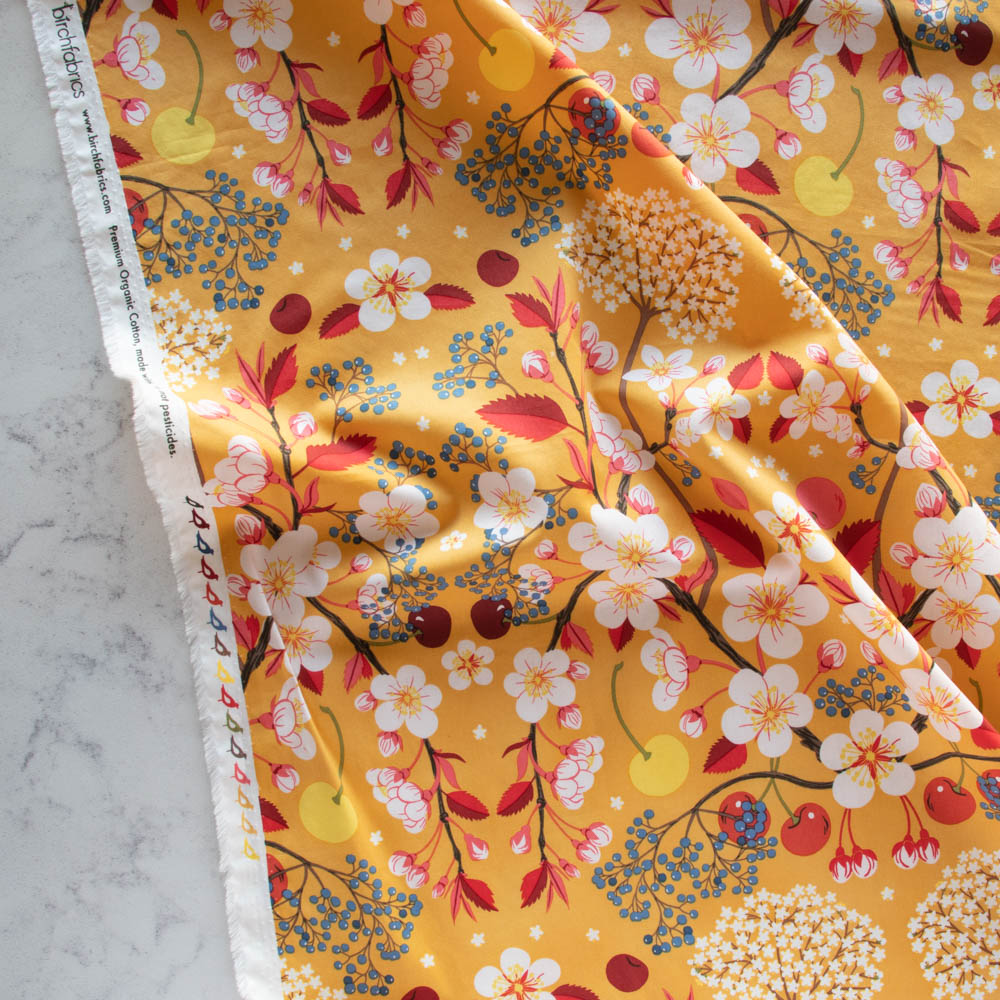

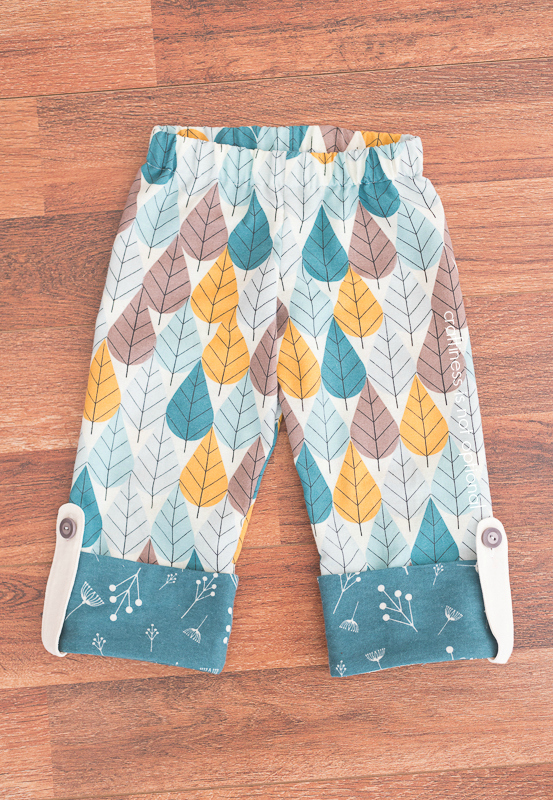
By now, we have had the pleasure of working with Jess of Craftiness Is Not Optional, not one, but three times now! And every time we do, she knocks us out of our socks with her incredible creations, and clear direction. Her latest PDF pattern, these Charley Harper Pajama Pants, are no exception. They sew up quickly, but Jess has also added special touches like a cuff enclosed by french seams, and adorable button tabs. These cuties are sure to be treasured by all the little ones out there to receive them. Not to mention they’re made with our Charley Harper flannel, so they’ll be extra warm and cozy for the upcoming holiday season! Now without further adieu, take it away Jess!
……………………………………………………………….
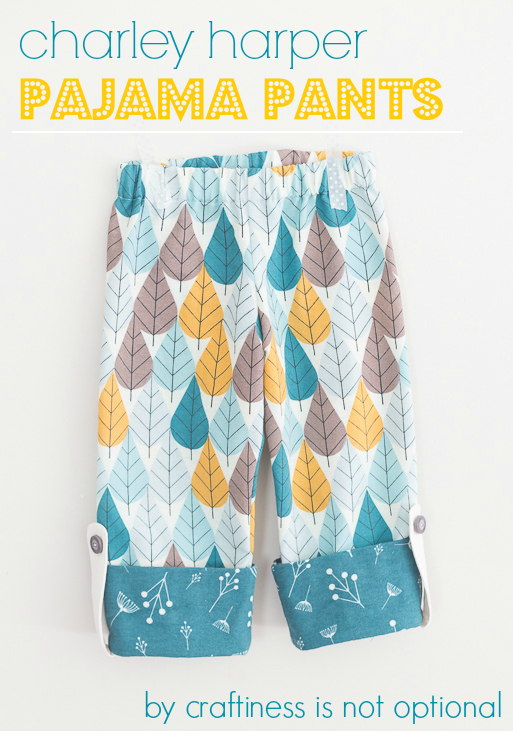
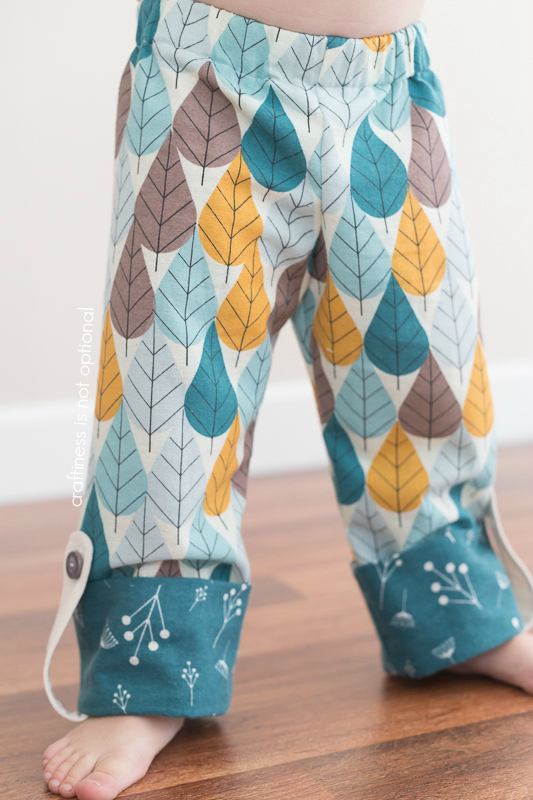
I am so very excited to be here with a fun tutorial for these comfy PJ pants for Birch Fabrics! They sent me some amazing Charley Harper organic flannel, which is so soft and lovely to work with. Charlotte and I had a blast designing some fun cuffs and button tabs for the bottom of the pant-adjustable as well for if your kids grow straight up mostly!


You might be able to play around with it, and print it off at different scales for different sizes, or add length/take away length-I am planning on grading this into other sizes in the near future, so look for that pattern soon…for now, here you go!
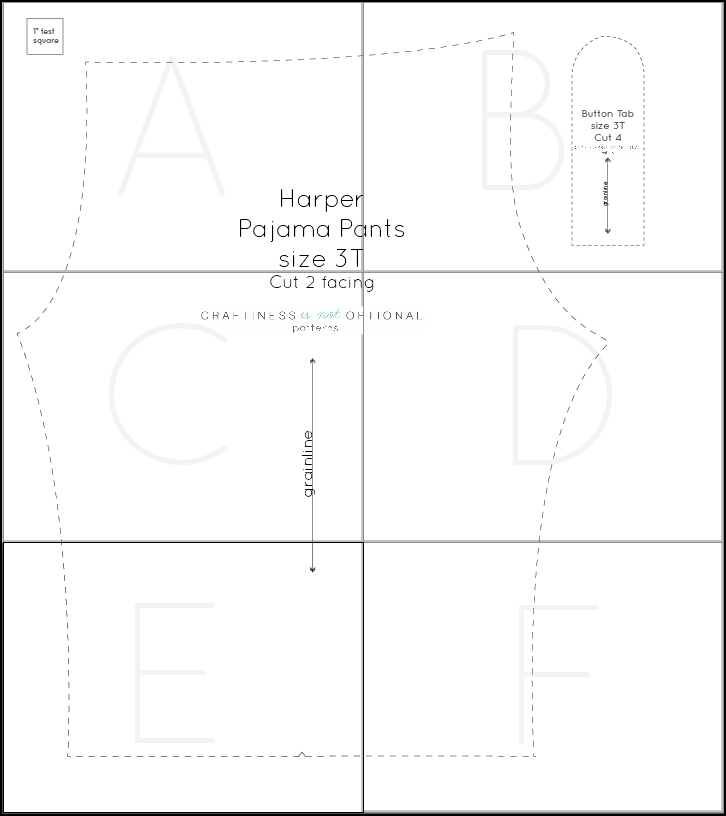
Here’s a printing guide for taping the pattern together! Print at 100%, no scaling (there is a 1″ box to check on the first page), cut at the grey lines, and then piece and tape together like the pic below shows!
You’ll need:
about 3/4 yard main fabric
FQ or 1/4 yard of accent fabric (also a small scrap or FQ for the button tabs)
1 yard 1″ non roll elastic
2 buttons
scrap of interfacing

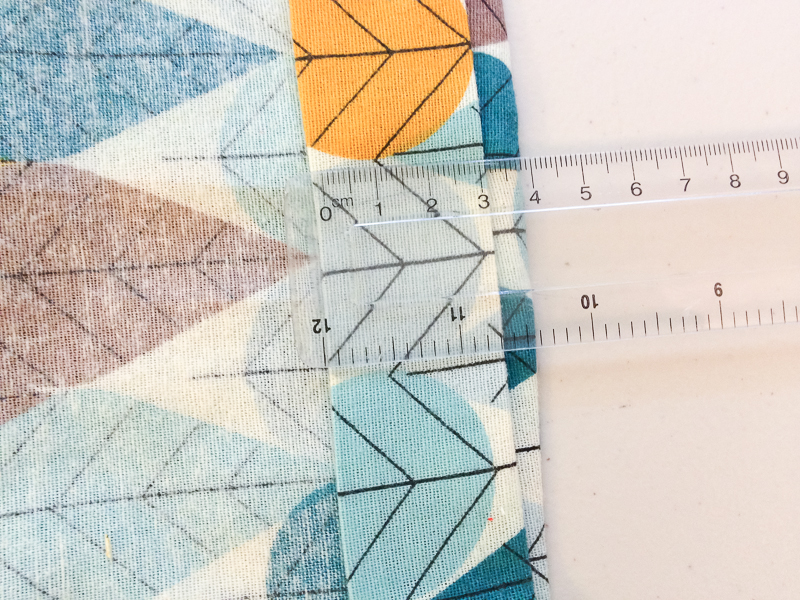
Also, for the cuffs-cut two rectangles 8.5×13″. If you size it up or down using your printer scaling options, just measure the bottom of the leg for your width measurement. Cut out 2 facing, from the pant pattern, and 4 of the button tab. Seam allowance is 3/8″ unless otherwise specified. Transfer notch on the bottom of the pant leg. For the 3T size, cut 19″ of 1″ elastic.

First, let’s begin with the button tabs.
1. Pin and sew right sides together, around the sides and curved end, leaving the short straight end up, backstitching at beginning and end.
2. Trim seam allowance to 1/8″
3. Turn right sides out, press, and topstitch around the sides and curve, 1/8″ from the edge.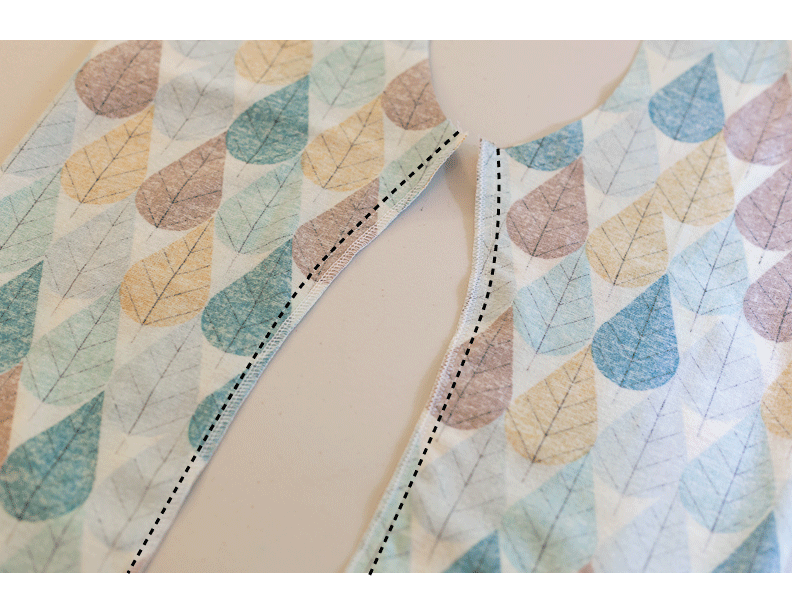 For both pant legs, fold in half right sides together, pin, and sew the bottom half of the leg. Finish the seams with a serger or zig zag stitch.
For both pant legs, fold in half right sides together, pin, and sew the bottom half of the leg. Finish the seams with a serger or zig zag stitch.
Next take your two cuff pieces and fold in half-short raw edges matching, and with fabric right sides together. Pin and sew, finish seams.

Turn cuff right side out, and bring both raw edges together, wrong sides facing. Make sure the seam is laying flat inside the cuff and not twisted.

Next, make sure your pattern will be right side up if you have a directional pattern. If you do, insert the cuff into the pant leg, right sides together…and make sure the directional print is facing down towards the bottom of the pant leg like the picture above shows.
Next match up the side seams on the cuff and pant leg and pin.

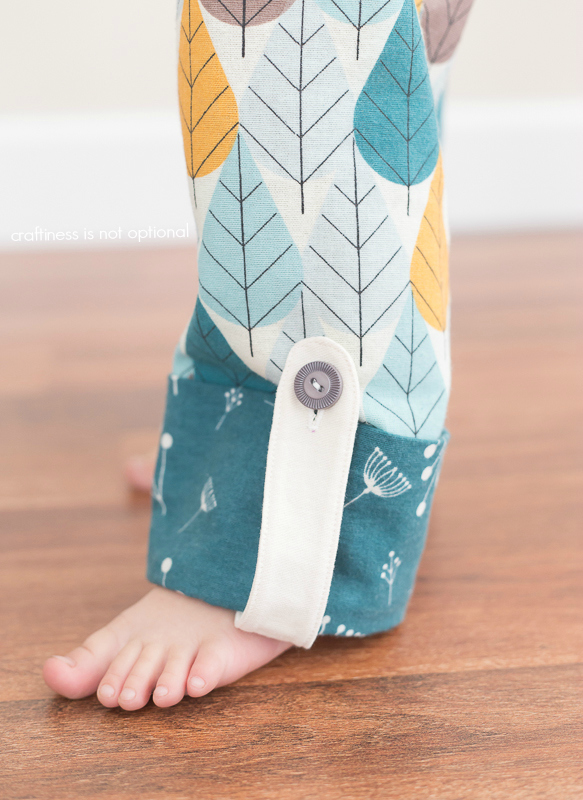
match up the middle of a button tab with the notch you made. Place the tab on the wrong side of the pant leg fabric.
Pin together…it should look like this now!
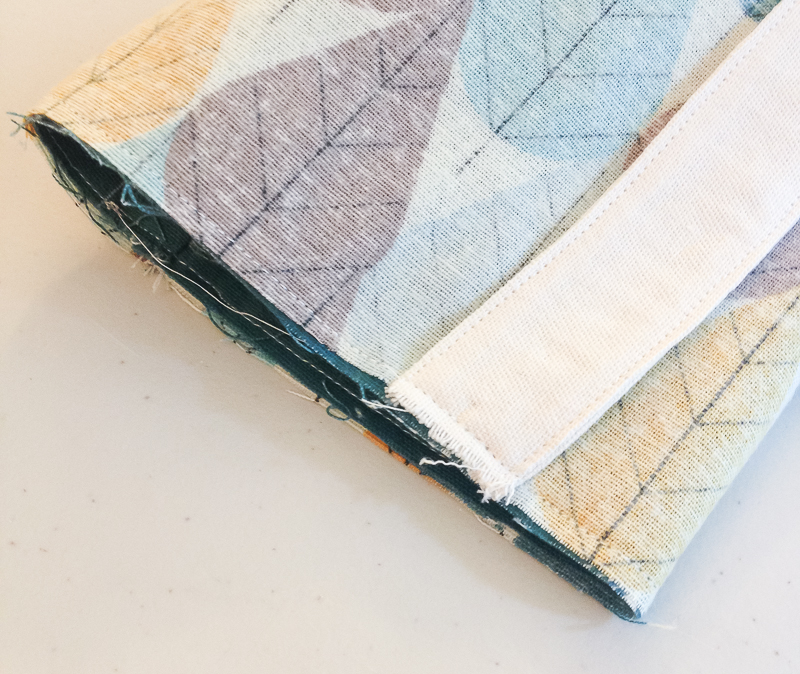
Sew around the bottom of the pant leg-with a 1/4″ seam allowance.
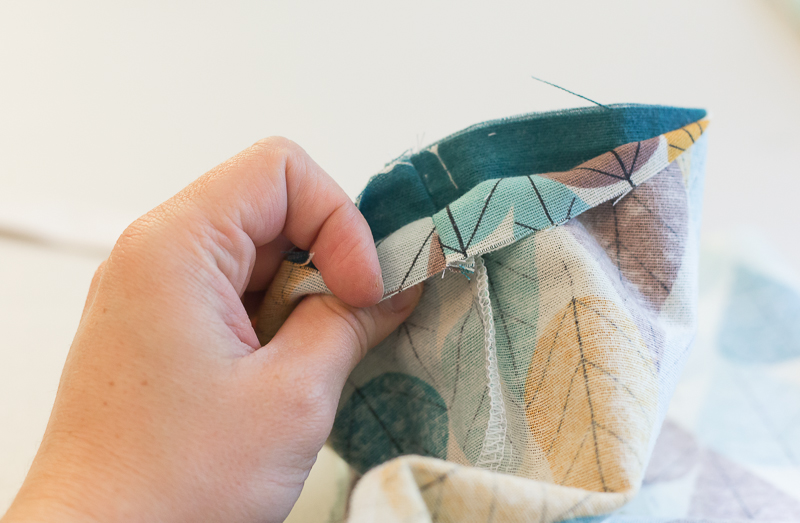
Pull cuff out like so…

Then fold it around so that the cuff is facing up toward the wrong side of the pant leg. Finger press the bottom edge, using your fingers to roll out the fabric so that it’s as even as possible, then pin.

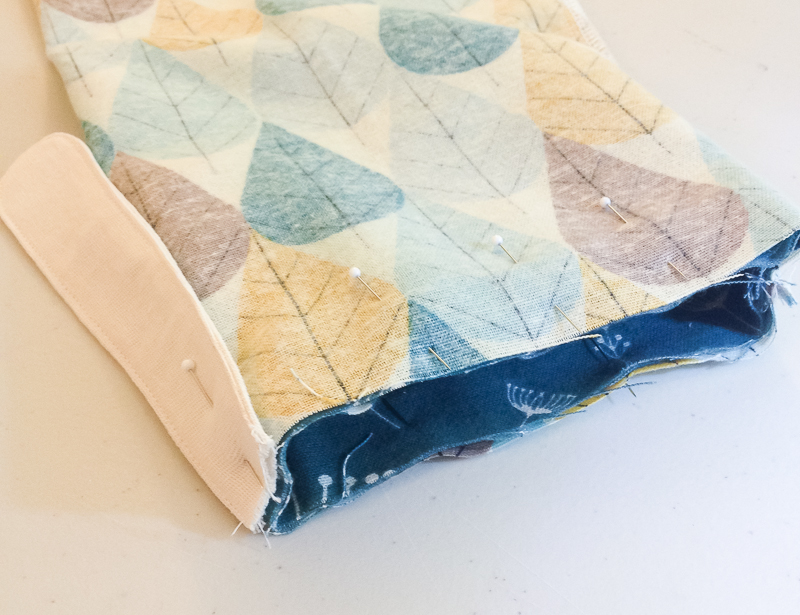
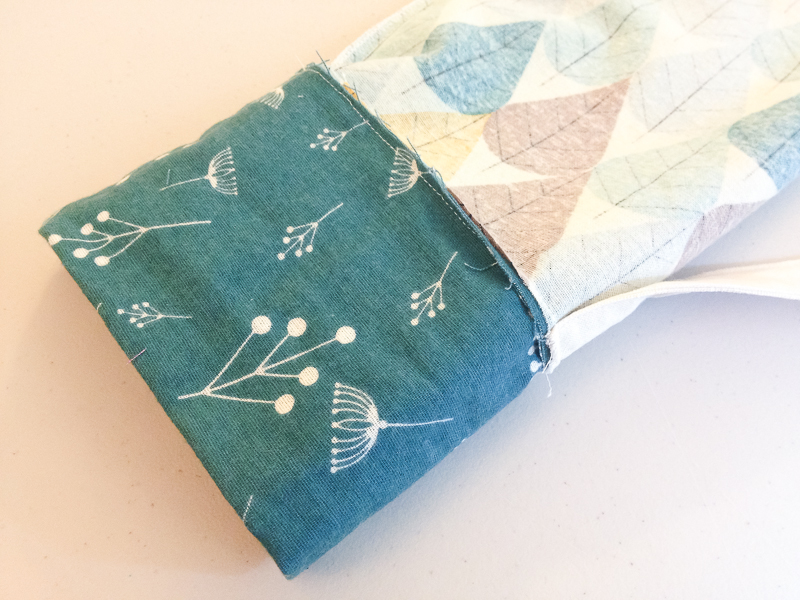
Sew around the bottom of the pant leg with a 3/8″ seam allowance, enclosing the raw edges and creating a fancy schmancy french seam.

Tada! Repeat the cuff steps for the other leg.
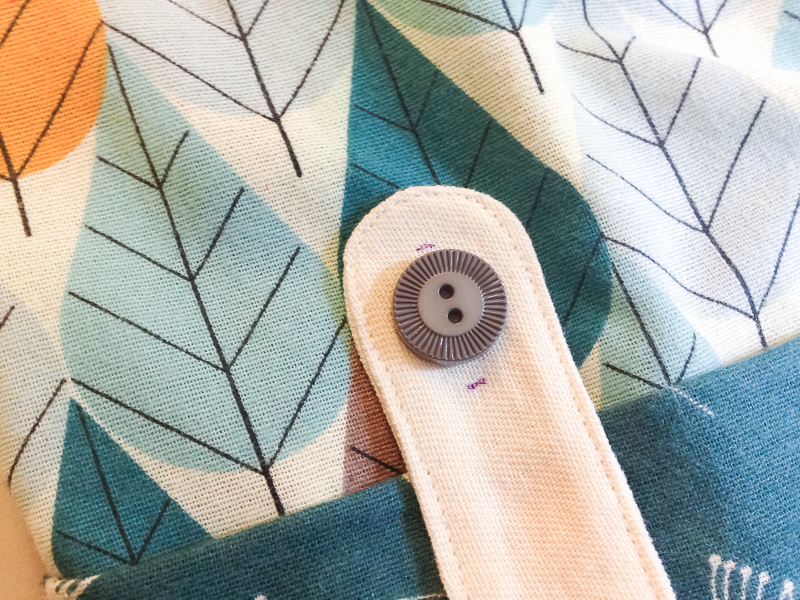
Next bring the button tab around to the right side of the pant leg and mark the spot for your button hole. Make the button holes for both tabs and cut open.

Next insert one pant leg into the other, with right sides together. Match up the inside leg seams.
 Pin right sides together and sew around the curve. Finish seam.
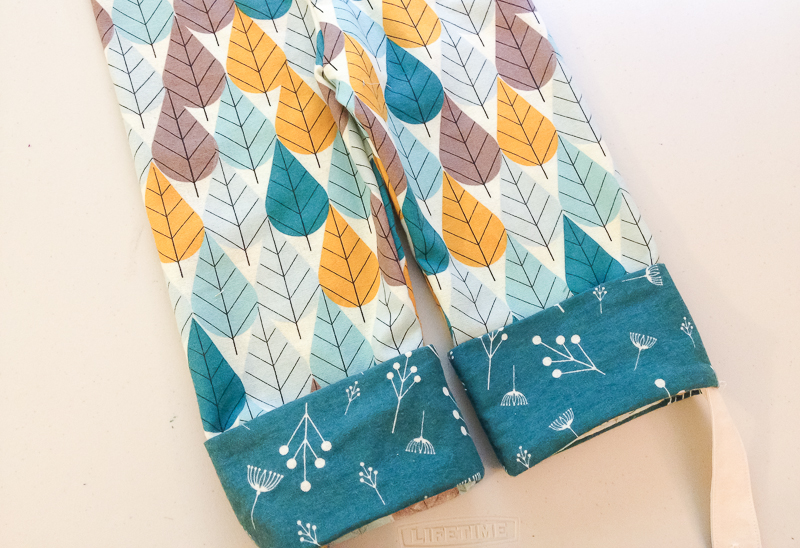
Then turn right side out and admire so far!

Now the waistband. Working with the top of the pants-press over the raw edge towards the wrong side of the fabric 1/4″.
Then fold over and press another 1 3/8″.

Sew around the bottom of the casing you just pressed, leaving a 1 1/2″ space for the elastic. Don’t forget to tuck in a size tag or ribbon tab to show the back of the pants (the side with a higher rise).
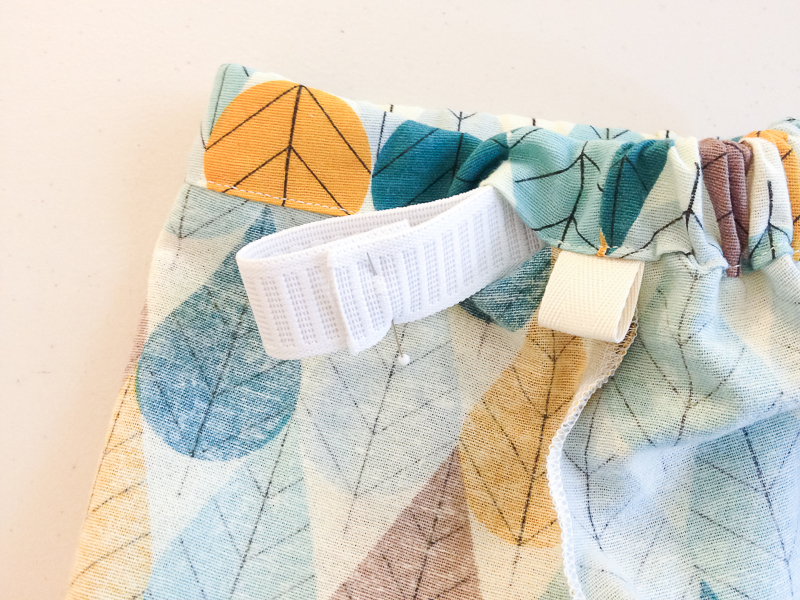
Insert your elastic with a safety pin and pull it through the casing. Overlap the ends together 1/2″, and sew. Then pull the elastic back into the casing, and sew the opening shut. Sew on the buttons, using a 1/2″ scrap of interfacing to stabilize where you are sewing it to the sides of the pant legs, then you are done!

If your child is like mine and grows up, not out, you can let out the hem easily to accommodate that growth -at least a few inches! Just fold the cuff down lower, and snip that button free and move the button down! easy peasy.
……………………………………………………………………………………….
Thank you Jess for creating these undeniably adorable, and incredibly handy pajama pants pattern! Look for the graded pattern coming soon to Craftiness Is Not Optional and also look for our Charley Harper Flannel coming to a shop near you next month!