

Excited to be here once again, bringing you another fun tutorial! This sleep mat has been on my “to-make” list for a while. They’re just so useful! I have 3 little ones, ranging from 5 to 1, and this mat is great for all of them. (It will make movie watching so much more peaceful – no more fights over covers!) This would also be a great project if you have a little one going off to preschool, to have for sleepovers, or to make as a gift. It features a built in snuggly blanket, an attached pillowcase with removable pillow, removable inner mat so it’s easy to wash, and the whole thing rolls into a neat little bundle. The best part is that it’s really simple to change it up to suite your own needs. And like many of my projects – it’s great for beginners!
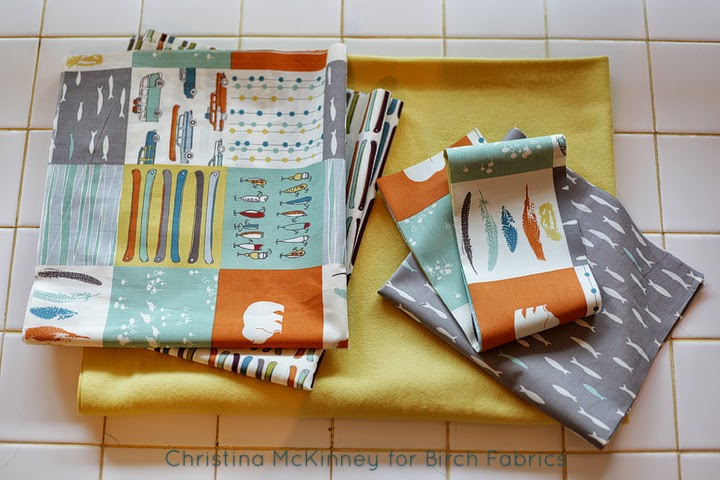
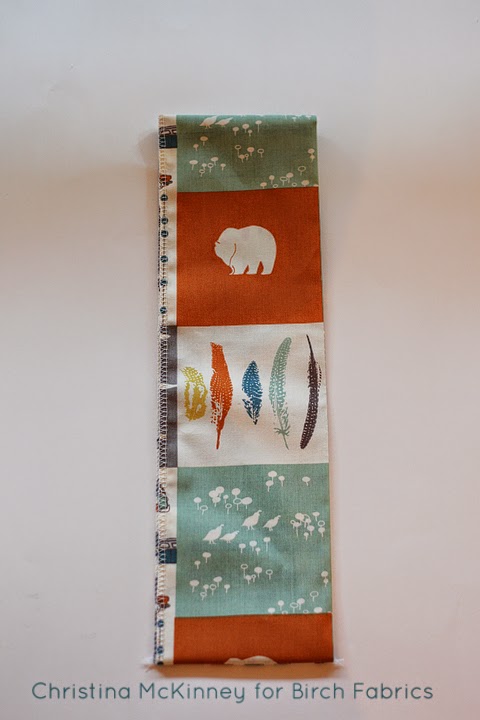
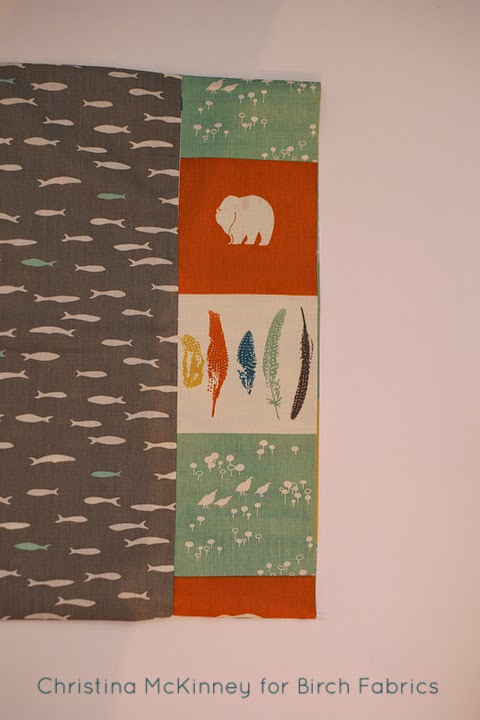
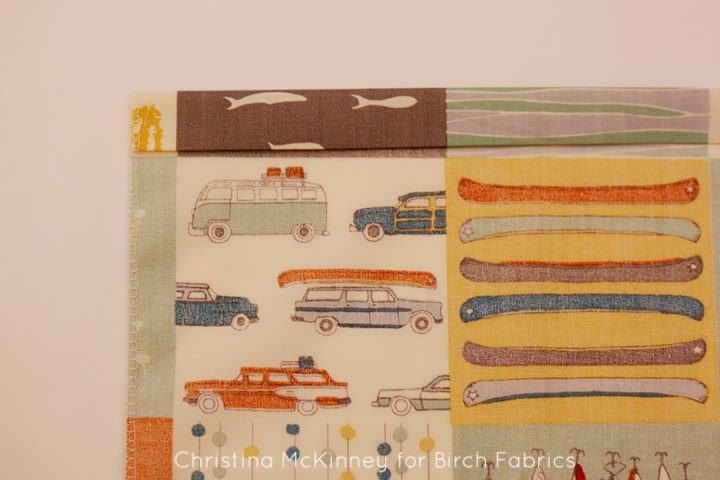
This project features fabrics from the adorable Feather River collection by Jay-Cyn Designs and divine Organic Fleece by Birch. Until I had a son, I never knew how hard it could be to find a good “boy” print. But the Feather River collection definitely fits the bill! I am absolutely in love with each and every print!
Tips before you start:
*Ok, so I’m not usually big on pushing pre-washing, but for this project I STRONGLY recommend you prewash and press your fabrics for this project. The normal amount of shrinking that occurs in fabric would be just enough for your mat to no longer fit inside properly. I have included a little extra in my fabric supply list to compensate for the small amount lost after washing/drying.
*Your seam allowance is 1/2″ throughout unless otherwise stated.
*I do recommend pinning to keep things lined up however I DO NOT recommend sewing over your pins.*
Finished dimensions: 24″ wide by 45″ long, or 24″ byf 60″ with the pillow flipped up.
Supplies:
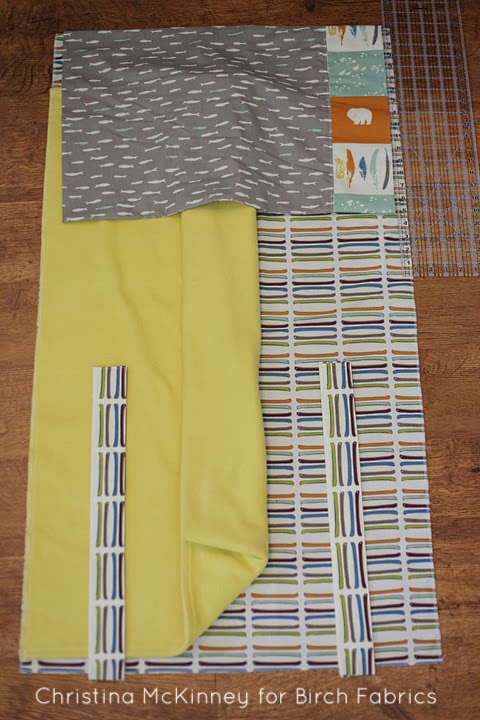
Inner print – 1 1/2yd
Outer print – 1 1/2yd
Fleece/blanket fabric – 2yd
Pillow case main print – 3/4yd
Pillowcase accent fabric – 1/2yd, or leftover from one of the main prints
Strap fabric – 1/2yd, or leftover from one of the main prints
3/4 wide sew on Velcro – 2yd
1 travel sized pillow (mine measures 14 X 20)
1in thick foam pad, should measure 23 X 44. (I’m using ‘by the yard’ padding from Joann’s. I had to trim the width by 1in to help it fit correctly.)
Optional – 1/2yd of iron on interfacing for straps


Cut all pieces from prewashed/pressed fabric.
Cut list:
Inner print: cut (1) 25″ by 46″
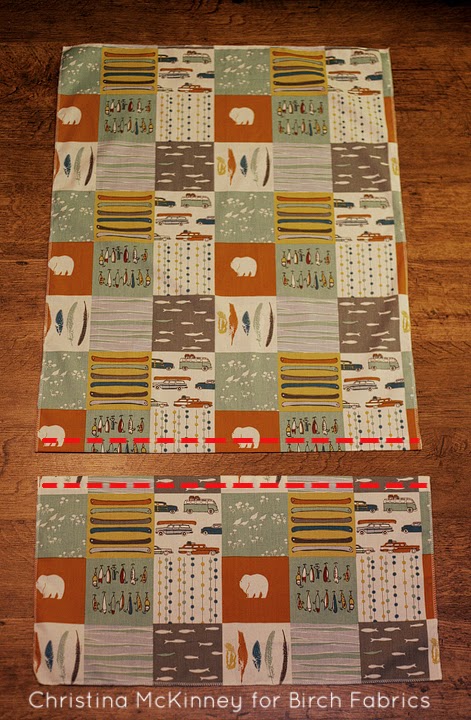
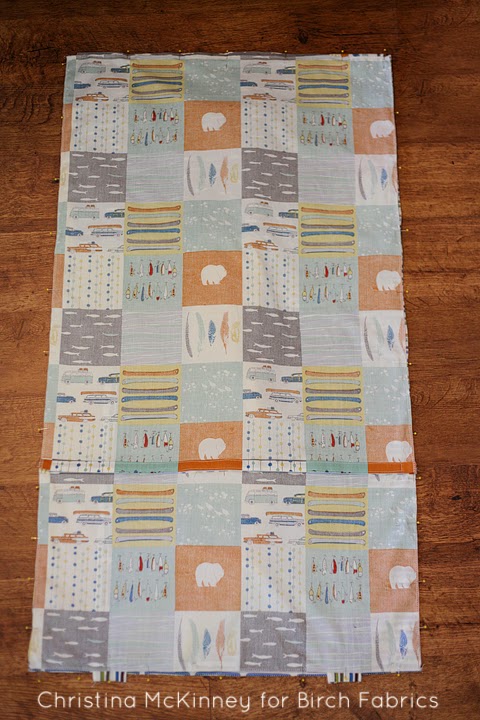
Outer print: cut (1) 25″ by 15.5″, cut (1) 25″ X 34″
Pillowcase main print: cut (1) 17.5″ X 40.5″
Fleece/blanket fabric: cut (1) 64″ wide X 41″ long (will be folded in half) **NOTE** The fleece cutting dimension only works with 64″ wide bolts. If you’re using a smaller size bolt, cut (2) 32.5″ X 41″ instead.
Velcro pieces: cut (4) 6″ strips from the LOOP side only, cut (4) 2″ strips from the HOOK side only, and cut (1) 23.5″ strip from BOTH sides
Foam mat: cut (1) 23″ wide X 44″ long
Optional strap interfacing: cut (4) 19.5″ X 2″ strips
Cut these pieces from your leftover main prints:
Straps: cut (4) 20″ X 5″
Pillowcase accent print: cut (1) 9.5″ X 33.5″
If you prefer, serge all edges before you begin sewing.
Now let’s get started sewing!
Begin by assembling the pillow case. Take your 9 1/2″x33 1/2″ accent piece, fold it in half lengthwise, and press. It should now measure 4 3/4″ wide by 33 1/2″ long.
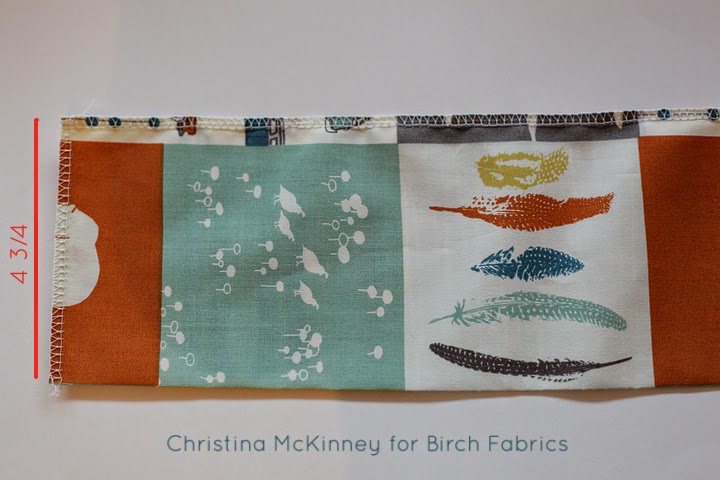
Decide which will be the “right side” of the accent piece, then sew across the short end with right sides together. I fussy cut mine from the Feather River Patch print, so I just picked which side I liked best.

Flip the accent piece right side out and give your seam a quick press to either side.

Now take the main body pillowcase print and fold it in half lengthwise with right sides together. Folded in half it should measure 17 1/2 X 20 1/4. The fold will act as the back seam, so you just need to sew up the two long sides leaving the remaining short side open for turning.

Turn the pillowcase body right side out and using a turning tool or chop stick, carefully poke out the corners for a nice pointed edge. Press.

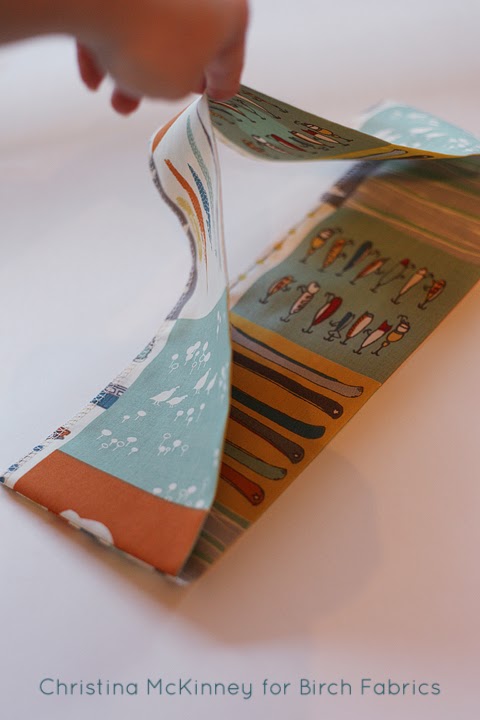
You should now have an accent piece “tube” and a pillowcase body. With your pillowcase body RIGHT side out, and the accent piece WRONG side out, slip the tube over the open edge of the pillowcase body, matching up raw edges. The right sides of each piece should be facing each other. The only seam on the accent piece should be matched up with the bottom seam of your pillowcase body. Pin in place and sew.

Flip right side out and press the inner seam toward the main body of the pillowcase.
Topstitch along this seam. You now have a cute little mini pillowcase!


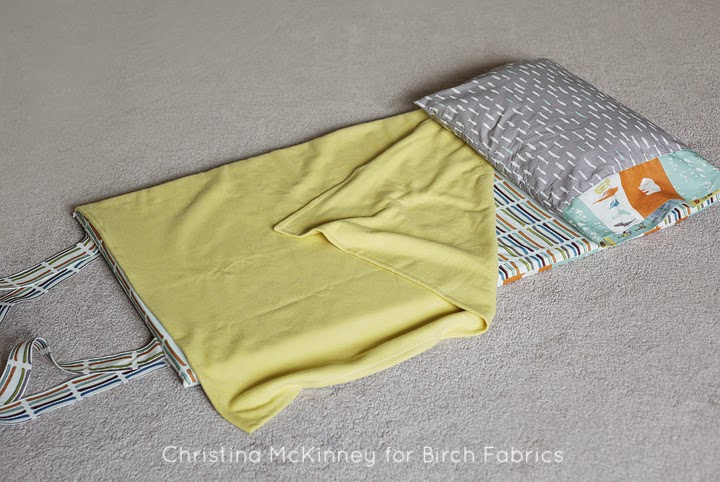
Next you will be assembling the blanket portion. If you cut your fleece as one piece, fold it in half lengthwise. It should now measure 32 X 41. With right sides facing, sew along each 32in side leaving the long (41in) side open for turning.
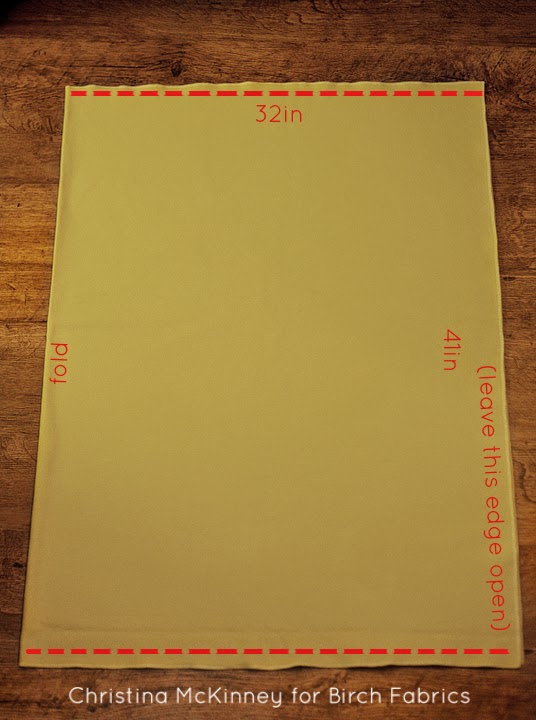
Turn the blanket right side out. Using a turning tool or chop stick, carefully poke out the corners for a nice pointed edge. Give the seams a light press. (According to ironing directions of your chosen fabric.)

Topstitch around the 3 sides. If you prefer, run a basting stitch 1/4 from the edge on the long open side. This will help with pinning and sewing it onto the mat later. And now resist the urge to snuggle under your new cozy blanket….

Note: If your fleece/blanket fabric was instead cut into two pieces, your assembly is only slightly different. With right sides together, sew the pieces together along 3 sides, leaving one long side open for turning. Once sewn, turn right side out and use a turning tool or chopstick to gently poke out the corners. Baste along the long open edge if you wish and you’re done with the blanket!
Now you will need to fold down the edges where the Velcro strips are attached.
Fold down 3/4in to the wrong side of the TOP long edge of your 25in X 15.5in piece and press this fold in place.

Fold down another 3/4in and press in place.
Repeat these steps with the BOTTOM long edge of your 25in X 34in piece. (Refer to dotted lines on the photo above for placement)
Next you will pin your Velcro strips in place. Start with the smaller lower piece of your backing. Make a small mark 3/4 from the edge on the folded side, with the fabric flipped to the WRONG side. This will be where you start pinning the Velcro strip. (This keeps it from being in your side seam later on) The strip should be 3/4 from the edge on both ends.

Pin the HOOK side of your Velcro along the top edge of the bottom piece on the WRONG side.


You will repeat this process with the larger upper back piece, however the LOOP side of your Velcro goes across the bottom on the RIGHT side of your fabric. It will also be centered 3/4 from each edge.

Sew each strip of Velcro in place. You should now be able to overlap the bottom smaller piece and upper larger piece and secure them together with the Velcro strip.
View from the wrong side of the back piece:

This piece should now be the same length as the front panel piece.

The last step before you assemble the mat is to make your straps. I did a slightly generous length for these straps as well as the Velcro position to accommodate both the bulk of the bed itself, but also any other sleep items your child may want to include with their nap mat. I don’t know about your kiddos, but mine all have stuffed animals they just can’t live without. So even with a few extra items, your mat should still roll up and secure just fine.
Alright, now I have to confess something….I hate sewing/turning tubes of fabric. I will avoid it at all cost! The way I have you constructing these is to avoided having to do that. (I’m just trying to make it easy on you!)
So, you should have cut (4) 20in X 5in strips.

I like to put these together assembly line style because I think it makes them come together faster. Fold the long side of each strip down 1/4in toward the WRONG side of the fabric. Press.

Once both long sides are folded and pressed, fold the entire strip in half length wise with WRONG sides facing and the folded edges matched up.

If you choose to use interfacing, add it now. Lay the strip face down on one of the long sides. The interfacing strip should line up with one short edge, but be 1/2in away from the other short edge. Iron in place according to your interfacing directions.

On the short edge where the interfacing is 1/2in away from the edge, fold down each corner toward the WRONG side to just a hair above the interfacing edge. (a hair – technical measuring term, I know.) Press in place.
Fold the end down toward the WRONG side/interfacing. Press in place.

Keeping that end tucked in, refold along the center seam and press again. I found that using spray starch for this particular step really helped. You should now have a nice edge with all raw seams tucked in.
Repeat these steps for all 4 straps. Once they are all pressed and ready, topstitch around the 3 finished sides. The raw/unfinished short edge will be tucked into your seam and doesn’t need to be stitched.

I decided to wait to add the Velcro until after my mat was assembled. Personal preference! I didn’t want to have to remove straps and stitching in case I sewed them in wrong. So, if your brain can work that out better than mine, feel free to add your Velcro now. Otherwise, the Velcro positioning directions will be further down.
Note: If you would like to add any kind of applique/personalization to the front or back of the mat, do so now before going to the next step. If you want to add a name/initials to the bottom back, to show when the mat is rolled up, keep in mind that your design should be 6 1/4inches from each side edge and 1-2in from the bottom to avoid being covered by the straps and seams.
Now comes the fun part – the final assembly of the mat!! Bear with me, we’re going to just do this a layer at a time to make it easier.
First, lay your main body FRONT piece down, RIGHT side up.

With a ruler, measure 3/4in from the bottom edge to position your fleece blanket. The raw edge of your blanket should be lined up with the long straight edge. Since the blanket is wider than the mat, you will need to fold it back some to avoid it being inadvertently sewn into the seam on the opposite side.

Next, determine which is the “right” side of your straps and lay them together with right sides facing. Make sure the raw edges are both on the same end. You should have 2 sets of 2 straps.

Using your ruler to measure, lay your strips 4 inches from the long sides of the mat. The raw edges of the straps should be lined up with the raw edges of the bottom of the mat, with the length of the straps toward the mat. I ended up folding over the blanket one more time to make sure it was out of the way of the straps as well.

Now you will lay your assembled pillowcase right side down (if it has a distinct “right” side) and match up the bottom seam of the pillowcase with the upper raw edge. Center the pillowcase so that the edges are not caught in your side seams. You should have a 1/2in gap on either side.
The bottom seam created when you sewed the accent piece onto the pillowcase should be matched up with the raw edge of the mat so it is hidden in the seam when you sew it all together.

And finally, lay the BACK main piece on top, right side down. Pin around each straight edge, making sure to catch all layers. You’ll notice I extended the straps a bit past the raw edges, about 1in. This is just to make sure they’re completely sewn into the seam.
I have circled some spots to be extra careful with while sewing.

Sewing slowly, go around all 4 sides of your mat. You do not need to leave a turning gap because you can turn it all right side out through the Velcro opening on the back. Once you have sewn all edges, check to make sure you have correctly caught all layers. (and that you haven’t accidently sewn through a strap. Oops.) Note: Once I was sure all edges were correct, I actually serged all around my 4 sides before turning it right side out. If you don’t have a serger, you could also zigzag the edges. Since it’s an item made for children, I felt like reinforced seams couldn’t hurt. Also, it’s nice to not have strings after washing. And I’m maybe a bit of a serge-a-holic. So it’s not required by any means, but I think it’s a simple step that goes a long way in improving your project.
Once you are sure all seams are secure, trim your 4 corners to reduce bulk when turning and carefully pull open the Velcro on the back piece to begin turning your mat right side out.


Once the bulk of the mat is turned right side out, use a turning tool or chopstick to carefully poke out all 4 corners.
It’s completely optional, but I recommend giving the edges a nice press once the mat is turned completely.

You’re almost done……..
Time to add the Velcro to your straps, if you haven’t already done so. I recommend doing it BEFORE you insert the foam mat. Not that anyone I know would make such a silly mistake…
It was helpful for me to roll up the mat, wrap the straps around and pin them in place to make sure I was positioning the Velcro correctly. I pulled the lower strap to one side to make it easier to understand where to place your Velcro pieces.

Take 2 of your 2in HOOK pieces of Velcro and position them horizontally across the bottom of your top strap. Then measure 2in from the bottom edge of the opposite strap and pin 2 strips of the 6in LOOP side of the Velcro in place. The 6in strips should be about 1/4in away from the long side and there will be a small gap between them.

Stitch the Velcro in place. Repeat with the second set of straps.

Now grab your pillow and foam mat. (I got some pretty funny looks from my kids while I was stuffing the green padding inside, they were quite amused.) I found that it helped to pinch the foam insert in half, push it into the larger top half, then unfold it. After that you just have to smooth it out and tuck the bottom edge in. Your mat should fit fairly easily and lay smooth once the Velcro across the back is secured.

TA-DA! You’re done!!
Now find a cute kiddo that needs a snuggly place to nap


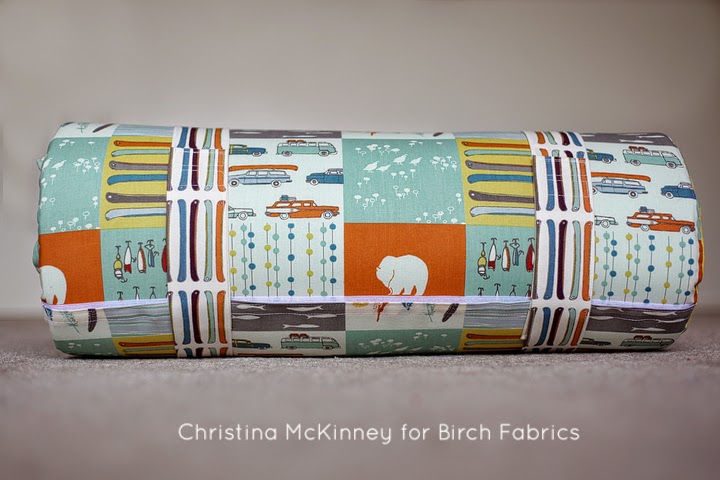
How to roll up your mat:
Open the mat completely and fold the blanket back a few inches from the edge. (This is also the position you would put the pillow in for a taller child to use the mat)

Start rolling from the pillow end by folding the pillow over

Continue rolling tightly till you get to the end

Secure your straps around the mat.

A few post-notes for you –
I chose the 1in foam from Joann’s, but I know there are several other options out there. I have heard that there are vinyl nap mats sometimes available at Walmart/Target that also make good inserts since they can be wiped clean. However I didn’t have any luck finding any of those. If you do choose a different insert, be sure to adjust your dimensions accordingly. As a rule of thumb, the finished dimensions of your mat should be 1in larger than your mat size for a 1in thick mat, 2in larger for a 2in mat…you get the idea. For the travel pillow – I bought one, but you could just as easily make one from a couple pieces of muslin and some polyfil. I also tried to make this flexible for a wide range of child heights. My oldest is 5 and 46 1/2in tall and with the pillow flipped up, even she fits on this size mat! I would suggest though if you are making this for a taller child using these same dimensions, cut your fleece blanket to 44 1/2in tall so that it will better cover a taller child. You can also adjust the fleece blanket to make it wider if you have a kid that likes to be a little more bundled in their blanket. This is a super flexible project! I hope y’all have fun with it!