

We are thrilled to pieces to share this adorable pencil pouch tutorial with you! Our talented colleague, Christina McKinney, worked up this fabulous tutorial for all you beginning sewers out there. Or even if you need a quick go-to project to give as a gift, this is it! Check it out!
Here is what you are going to need:

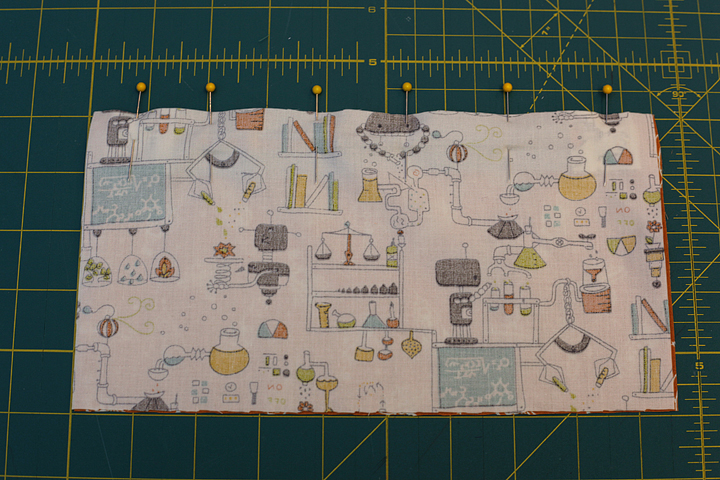
- 2-outer pieces, 9.5in x 5in
- 2-lining pieces, 9.5in x 5in
- 1-7in zipper
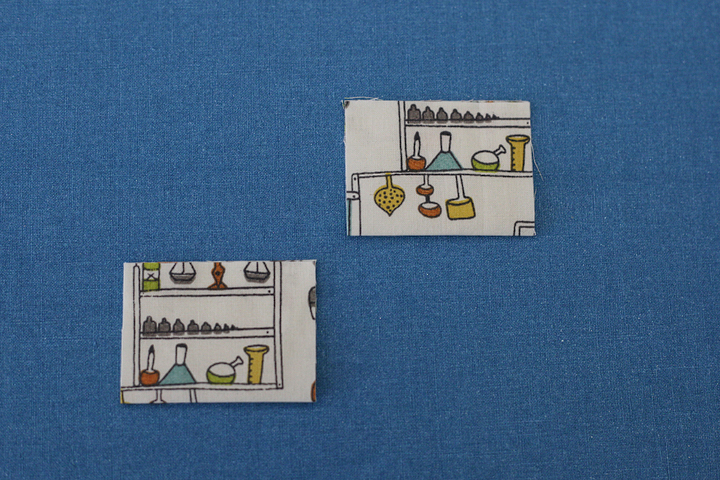
- 2-zipper tab pieces 2in x 3in (cut in the outer fabric)
- Optional: 2 pieces of heavy or medium weight iron-in
interfacing cut to 9.5in x 5in. Iron this to the wrong side of the outer
pieces. This will give your pouch extra stability.
Notes before getting started:
This is a pretty basic pattern that can be made bigger/smaller
depending on your preference. I highly recommend prewashing then pressing your
fabric before cutting. (This will ensure everything is even and will give you a
more professional finished look.) I DO NOT recommend ever sewing over pins
during your projects. Stitch to just before the pin & remove as you go. And
finally, seam allowances vary in this project so make sure you double check
before sewing any of the steps.
Assembly:
Attaching the zipper tabs – Fold each tab piece in half length
wise & press.
wise & press.
Next, turn each side under 1/4 inch & press.


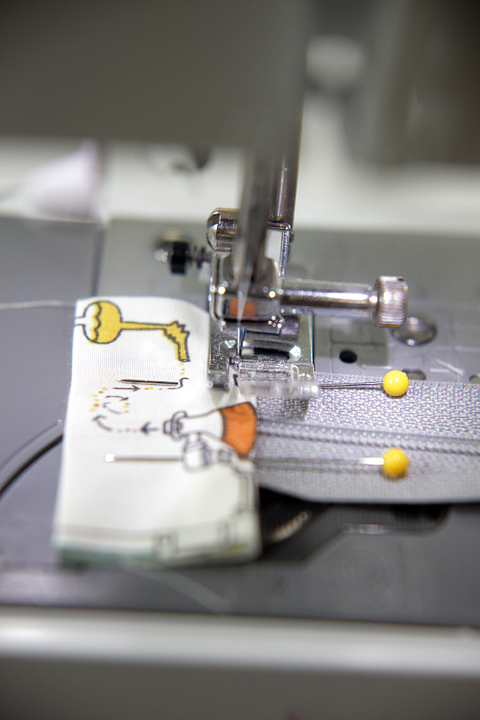
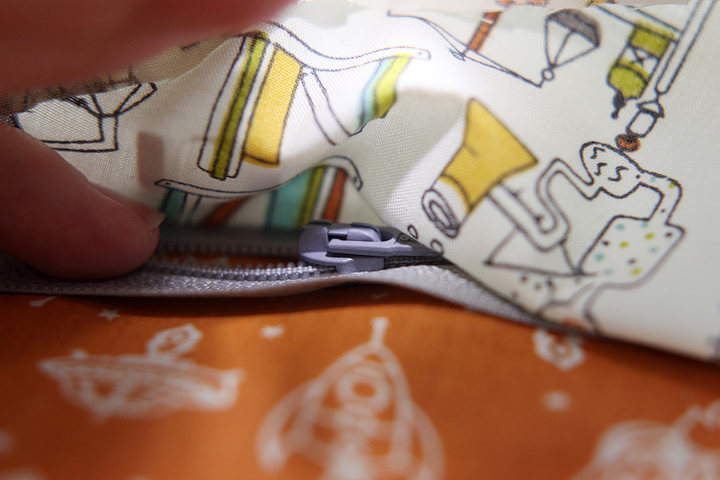
“Sandwich” the end of your zipper with the tab piece & pin
in place. Make sure that the ends
of your tabs are PAST the metal zipper tab before you sew.
in place. Make sure that the ends
of your tabs are PAST the metal zipper tab before you sew.

You need enough clearance to sew a 1/8 inch seam without
running over the metal stopper. (*important* Only do this with nylon/plastic
zippers. DO NOT sew over the teeth of a metal zipper.) Sew as close the edge as
possible and keep stitches neat. Go slow to help your machine over the zipper
teeth. For a finishing stitch such as this, I usually extend my stitch length a
little, something like 3 or 3.5.
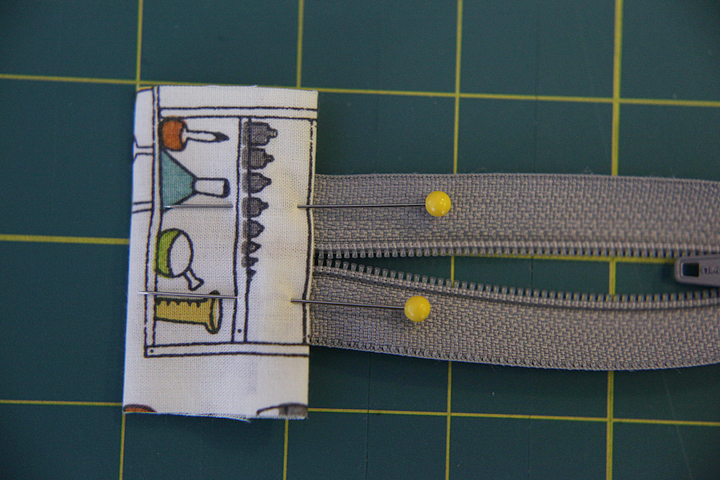
This is what you should end up with

Repeat with the other end. You will need to unzip the zipper
about halfway to make this easier. Once pinned in place, zip and unzip a couple
times to make sure you have the teeth lined up properly.
about halfway to make this easier. Once pinned in place, zip and unzip a couple
times to make sure you have the teeth lined up properly.

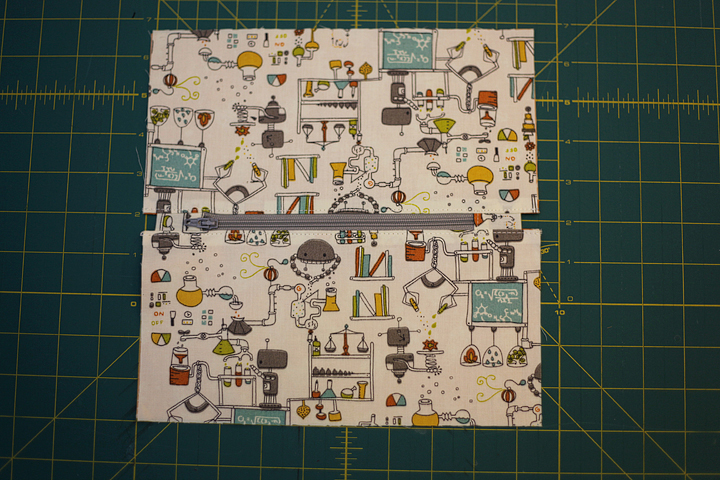
Once you have sewn tabs across both ends of the zipper, clip
the tab sides down even with the zipper.
the tab sides down even with the zipper.


Lay a piece of your lining fabric right side UP and lay the
tabbed zipper even with the top edge. (Make sure to center your zipper.)
tabbed zipper even with the top edge. (Make sure to center your zipper.)
Lay a piece of outer fabric right side DOWN, matching the top
edge, and pin in place. If your fabric has a specific direction, ensure that
you place it properly for this step to keep it from being upside down in the
final product.
edge, and pin in place. If your fabric has a specific direction, ensure that
you place it properly for this step to keep it from being upside down in the
final product.
So now you have a fabric & zipper “sandwich” and you will
stitch a 1/2 seam along your edge. A zipper foot makes this easier, but IS NOT
necessary for this. As you can see from this photo, I stitched this in place
with a regular foot. I typically start stitching with the zipper halfway open
so that it’s out of the way. (Wait to unzip it until everything is pinned in
place to keep things from shifting.) Don’t stress about sewing the zipper
without seeing it – you can feel it between the layers to make sure you don’t
accidently stitch over it. Just take it slow!

Once you near the zipper, stop your machine NEEDLE DOWN and
pivot your fabric around until you can shimmy the zipper back up. This will get
it out of the way while you finish stitching.
pivot your fabric around until you can shimmy the zipper back up. This will get
it out of the way while you finish stitching.

Once stitched, flip your layers right side out and press.

With your pieces now right sides out, you will stitch a 1/8 hem
along the edge going through all three layers. This gives a more finished look
and will keep your lining from getting caught in your zipper.
along the edge going through all three layers. This gives a more finished look
and will keep your lining from getting caught in your zipper.

As before, to make things easier, zip/unzip your zipper as you
sew and pivot it out of the way. This is what you should have so far:
sew and pivot it out of the way. This is what you should have so far:

Lay the second piece of lining fabric right side UP & lay
you assembled zipper piece right side UP on top.
you assembled zipper piece right side UP on top.

Next, lay your outer fabric right side DOWN on top and pin in
place. You’re repeating the steps from before to secure your lining/outer to
the other side of the zipper.
place. You’re repeating the steps from before to secure your lining/outer to
the other side of the zipper.

And just like before, you will stitch a 1/2 inch seam along the
edge ensuring you’re going through all layers. Don’t forget to zip/unzip your
zipper out of the way! Once the second side is stitched, turn the layers right
side out, press, and stitch in place.
edge ensuring you’re going through all layers. Don’t forget to zip/unzip your
zipper out of the way! Once the second side is stitched, turn the layers right
side out, press, and stitch in place.

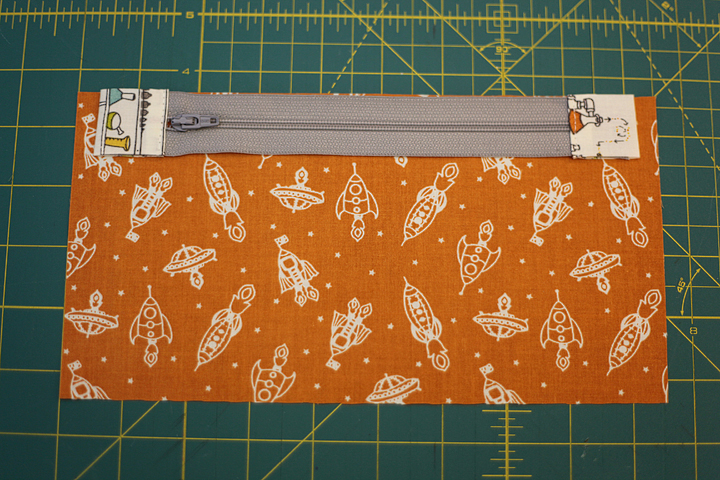
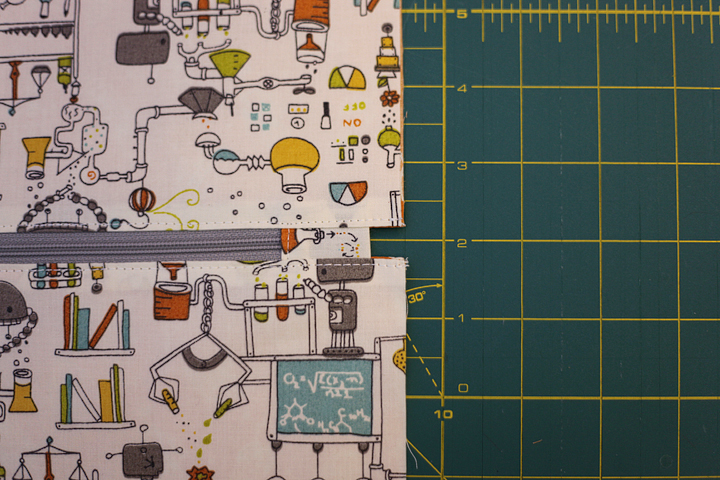
Your ends should look like this:
Before you do anything else, UNZIP THE ZIPPER!! (You cannot
turn the pouch right side out without the zipper open.) Take the pouch and open
each side, pairing the two outer pieces and two lining pieces. Put them right
sides together and pin in place.
turn the pouch right side out without the zipper open.) Take the pouch and open
each side, pairing the two outer pieces and two lining pieces. Put them right
sides together and pin in place.

When you get to the side where the tab is, just pinch it either
up or down and pin in place. (Just make sure that whichever direction you pick
is the same on both sides.)
up or down and pin in place. (Just make sure that whichever direction you pick
is the same on both sides.)

Mark a start/stop point on your lining side. (indicated in the
photo with a green & a red pin) You’re going to leave a small gap here for
turning the bag right side out.
photo with a green & a red pin) You’re going to leave a small gap here for
turning the bag right side out.

Make sure to secure the stitches on either side of the gap so
that they won’t come loose when you turn the bag.
that they won’t come loose when you turn the bag.

Stitch around using a 1/4 inch seam allowance. When you come to
the sides where the tabbed edge is, you’re sewing close to the tabs but not
through them. Once you’ve gone all the way around, clip your corners to reduce
bulk but make sure your don’t snip through your stitching.
the sides where the tabbed edge is, you’re sewing close to the tabs but not
through them. Once you’ve gone all the way around, clip your corners to reduce
bulk but make sure your don’t snip through your stitching.

Through the gap you left in the lining, turn the bag right side
out. Use something pointed to turn out all your corners. Be gentle! You don’t
want to stab through your seam! (I find that chopsticks are ideal for turning
corners.)
out. Use something pointed to turn out all your corners. Be gentle! You don’t
want to stab through your seam! (I find that chopsticks are ideal for turning
corners.)

Before you stitch the lining shut, leave it out and give the
outer fabric a good press.
outer fabric a good press.


Tuck under the open edge of your lining 1/4 and press.


You can do a blind stitch to close this or a small 1/8 inch
seam across the bottom. (Once your
pouch is tucked in and filled with goodies, no one will see the bottom of the
lining!) Tuck the lining down inside and you’re DONE!!
seam across the bottom. (Once your
pouch is tucked in and filled with goodies, no one will see the bottom of the
lining!) Tuck the lining down inside and you’re DONE!!


